The System

The System

Monday, June 27, 2016

Growing Seeds from "Scratch"

About a week ago I planted some red lettuce seeds and have seen great progress so far. I planted the seeds in small, rock wool grow-cubes. They are specially designed to maximize the growth of seedlings. This is because of the tiny air pockets and sponge-like qualities of the cubes. Here are some photos of the process. 

These are the grow cubes sitting in the propagation tray where they will remain until transplant. Prior to adding the seeds, I soaked the cubes in Ph6 water to optimize the acidity of the growing environment. I made sure to soak the cubes for extra long because I was going out of town for a week after planting these seeds. 

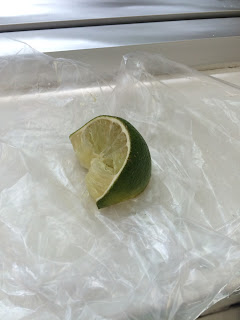
Pictured above are is a slice of lime and a pH test kit. I used the lime to bring down the acidity of the solution that the cubes sat in. As you can see by the picture on the right, the pH was about 6. The test kit works by filling the tube about halfway with the solution you are testing and adding two to three drops of the testing liquid. The more acidic the solution, the more red it appears after adding the testing liquid. If the solution is highly basic, it will have a blue appearance. 


Pictured above are two seeds in a grow cube. I typically plant to or three in each because not all will turn out right. When I transplant the cubes into netted cups with hydration, I will remove the "weakest"/ less desirable plant. 


This is a picture of the cubs 6 days after plating. The plants appear to be "stretching", which means they are not getting enough light. Since I am unable to get artificial light into this location and lettuce needs relatively little light, I am not too worried. The maroon-ish base the cubes are sitting on allows the roots to grow through the "net"on the bottom. This prevents the roots from growing flat against the cube. 

Sunday, June 19, 2016

Regulating Water Flow in an Aquaponics System

Two days ago I had the opportunity to fix the problems with the Aquaponics system I am currently building. There was one main problem: the water was entering the grow pipes faster than it could drain.

The solution: I attached a ball valve to the pipe at the point where the water enters. This way, I can truly control the water flow. In terms of the valve, what I expected to happen turned out true. As I made the hole the water pass through smaller, the water would shoot out faster. This remained true until a certain threshold, where the water began to trickle into the pipe.

Water passing through the valve

In the video above, you can see the water entering the pipes as I adjust the ball valve. Towards the end of the video, you see that I reached the point where it is only a small "trickle" of water entering the pipe. That is the level at which I would like it to remain. As long as the water is not draining as a significantly faster rate than the water entering, then I am glad. 

Another change I made was the height at which the water leaves the pipes. I set the drain tubes to the lowest height possible, which I think is an ideal height- just enough for most of the roots to get wet. 

As well as changing the drain height, I adjusted the level of the pipes. The support structures were purposefully made so that one end of the pipe was 1 inch lower than the other. This way, the water would be continuously flowing down the pipe. The only problem I encountered was that all the water would pool together on the lower end of the pipe. This left little water for plants on the higher end. 


This is a side by side comparison of the water on the high end(left), and water on the low end(right). The difference is quite obvious, one end is a small creek, while the other is like a river. 

By raising the height of the lower end, I achieved a greater balance in the water level throughout the pipe. 

I took these photos as water was running through the system, the second time so far. I ran the water through for two hours to make sure there were no leaks or flooding. 

Another "problem," if you may, was that the water was not draining out of the bottom pipe into the fish tank very fast. I quickly realized the problem: the hose clamp used to secure the end cap was raising the pipe. As soon as I returned the pipe to its proper position, the water instantly started flowing faster. 


In addition to the water flowing through the system, another great advancement was made: new fish were added to the system. 45 tilapia were purchased and will take about 9 months to mature. Since these are new fish, I will have to monitor the ammonia levels and such to make sure they do not die. 

To bring this post to an end, here is a photo of the fish tank. You can barely make out the fish, but that's alright.